
To enable SSH aka Tech Support Mode (TSM), in case you do not have it ready
From the vSphere Client
Select the host and click the Configuration tab.
Click Security Profile > (Firewall) Properties.
Click SSH Server Checkbox > OK Button to return to the Host Configuration screen.
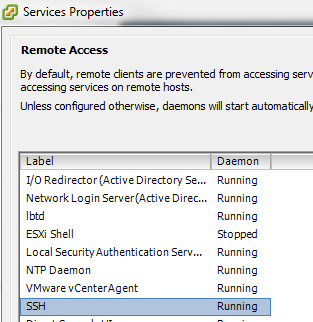
Click Security Profile > (Services) Properties .
Click SSH > Options Button.
Click Start and stop with host Startup Policy >
Start button > OK.
To enable SNMP
From an SSH Session
From the esxcli system snmp set context, the following options are available:
-a|–authentication=<str>
Set default authentication protocol. Values: none, MD5, SHA1
-c|–communities=<str>
Set up to ten communities each no more than 64 characters. Format is: community1[,community2,…] (this overwrites previous settings)
-e|–enable
Start or stop SNMP service. Values: [yes|no, true|false, 0|1]
-E|–engineid=<str>
Set SNMPv3 engine id. Must be at least 5 to 32 hexadecimal characters. 0x is stripped if found as well as colons (:)
-y|–hwsrc=<str>
Where to source hardware events from IPMI sensors or CIM Indications. One of: indications|sensors
-l|–loglevel=<str>
System Agent syslog logging level: debug|info|warning|error
-n|–notraps=<str>
Comma separated list of trap oids for traps not to be sent by agent. Use value ‘reset’ to clear setting
-p|–port=<long>
Set UDP port to poll snmp agent on. The default is udp/161
-x|–privacy=<str>
Set default privacy protocol. Values: none, AES128
-R|–remote-users=<str>
Set up to five inform user ids. Format is: user/auth-proto/-|auth-hash/priv-proto/-|priv-hash/engine-id[,…] Where user is 32 chars max. auth-proto is none|MD5|SHA1, priv-proto is none|AES. ‘-‘ indicates no hash. engine-id is hex string ‘0x0-9a-f’ up to 32 chars max.
-r|–reset
Return agent configuration to factory defaults
-C|–syscontact=<str>
System contact string as presented in sysContact.0. Up to 255 characters
-L|–syslocation=<str>
System location string as presented in sysLocation.0. Up to 255 characters.
-t|–targets=<str>
Set up to three targets to send SNMPv1 traps to. Format is: ip-or-hostname[@port]/community[,…] The default port is udp/162. (this overwrites previous settings)
-u|–users=<str>
Set up to five local users. Format is: user/-|auth-hash/-|priv-hash/model[,…] Where user is 32 chars max. ‘-‘ indicates no hash. Model is one of (none|auth|priv)
-i|–v3targets=<str>
Set up to three SNMPv3 notification targets. Format is: ip-or-hostname[@port]/remote-user/security-level/trap|inform[,…].
Example:
esxcli system snmp set -r
esxcli system snmp set -c anycommunity,anycommunity2
esxcli system snmp set -t 172.29.0.100@162/anycommunity
esxcli system snmp set -p 161
esxcli system snmp set -l warning
esxcli system snmp set -e yes
esxcli system snmp get
should return something like
~ # esxcli system snmp get
Authentication:
Communities: anycommunity, anycommunity2
Enable: true
Engineid: 00000063000000a1ac1d0c21
Hwsrc: indications
Loglevel: info
Notraps:
Port: 161
Privacy:
Remoteusers:
Syscontact:
Syslocation:
Targets: 172.29.0.100@162 anycommunity
Users:
V3targets:
The file that is created is /etc/vmware/snmp.xml, to edit it (Not generally necessary) directly type
~ # vi /etc/vmware/snmp.xml
<config>
<snmpSettings>
<enable>true</enable>
<port>161</port>
<syscontact/><syslocation/>
<EnvEventSource>indications</EnvEventSource>
<communities>anycommunity;anycommunity2</communities>
<targets>172.29.1.100@162 anycommunity</targets>
<loglevel>info</loglevel><authProtocol/>
<privProtocol/><engineid>00000063000000a1ac1d0c2e</engineid>
</snmpSettings>
</config>
Hit the escape key then type :wq! to save the file (you should see it type on the bottom left hand corner of your SSH window.
To start the service:
You can try /etc/init.d/snmpd start but doesn’t always work, another way is…
From the vSphere Client
Select the host and click the Configuration tab.
Click Security Profile > (Firewall) Properties.
Click SNMP Server > Options Button.
Click Start and stop with host Startup Policy >
Start button > OK.
Troubleshooting SNMP
If SNMP is not working, try this (Commands in blue):
From an SSH Session
~ # esxcli network ip connection list | grep 161
udp 0 0 0.0.0.0:161 0.0.0.0:0 11701841 snmpd
~ # esxcli network firewall ruleset list | grep snmp
snmp true
~ # esxcli network firewall ruleset rule list | grep -i snmp
snmp Inbound UDP Dst 161 161
If you do not have a value returned from the esxcli network ip connection list | grep 161command, try the following:
Make sure you are not out of space, delete the bad traps indicated by a bunch of .trp files. You may have a bad snmp target setting and the condition may lead to full disk.
Navigate to the directory by typing cd /var/spool/snmp
Delete the files by typing rm *
esxcli system snmp set -r
esxcli system snmp set -c anycommunity
esxcli system snmp set -e yes
esxcli system snmp get
For ESXi 5.0, 4.1
To enable SSH aka Tech Support Mode (TSM), in case you do not have it ready
From the vSphere Client
Select the host and click the Configuration tab.
Click Security Profile > (Services) Properties.
Click SSH > Options Button.
Click Start and stop with host Startup Policy >
Start button > OK.
Verify that the SSH service is running.
To enable SNMP
From an SSH Session
~ # vi /etc/vmware/snmp.xml
Edit the file as follows:
<config>
<snmpSettings>
<enable>true</enable>
<communities>anycommunity</communities>
<targets>172.29.1.100@162 anycommunity</targets>
</snmpSettings>
</config>
Type the escape key then :wq! to save the file.
~ # /etc/init.d/hostd restart
For ESX 4.0
To enable SSH (in case you do not have it ready)
Log in locally to the console using the “root” account
[root@vh-vmw-05 ~]# su
[root@vh-vmw-05 ~]# vi /etc/ssh/sshd_config
Change the variable for PermitRootLogin from no to yes
PermitRootLogin yes
Type the escape key then :wq! to save the file.
[root@vh-vmw-05 ~]# service sshd restart
To enable SNMP
From an SSH Session
[root@vh-vmw-05 ~]# esxcfg-firewall -e snmpd
[root@vh-vmw-05 ~]# vi /etc/vmware/snmp.xml
Edit the file as follows:
<config>
<snmpSettings>
<enable>true</enable>
<communities>anycommunity</communities>
<port>161</port>
<targets>172.29.1.100@162 anycommunity</targets>
</snmpSettings>
</config>
Type the escape key then :wq! to save the file.
[root@vh-vmw-05 ~]# service snmpd restart
Stopping snmpd: [FAILED]
Starting snmpd: [ OK ]
If you want to see if it is running type the following:
[root@vh-vmw-05 ~]# service snmpd status
snmpd (pid 13399) is running…
From an SSH Session
From the esxcli system snmp set context, the following options are available:
-a|–authentication=<str>
Set default authentication protocol. Values: none, MD5, SHA1
-c|–communities=<str>
Set up to ten communities each no more than 64 characters. Format is: community1[,community2,…] (this overwrites previous settings)
-e|–enable
Start or stop SNMP service. Values: [yes|no, true|false, 0|1]
-E|–engineid=<str>
Set SNMPv3 engine id. Must be at least 5 to 32 hexadecimal characters. 0x is stripped if found as well as colons (:)
-y|–hwsrc=<str>
Where to source hardware events from IPMI sensors or CIM Indications. One of: indications|sensors
-l|–loglevel=<str>
System Agent syslog logging level: debug|info|warning|error
-n|–notraps=<str>
Comma separated list of trap oids for traps not to be sent by agent. Use value ‘reset’ to clear setting
-p|–port=<long>
Set UDP port to poll snmp agent on. The default is udp/161
-x|–privacy=<str>
Set default privacy protocol. Values: none, AES128
-R|–remote-users=<str>
Set up to five inform user ids. Format is: user/auth-proto/-|auth-hash/priv-proto/-|priv-hash/engine-id[,…] Where user is 32 chars max. auth-proto is none|MD5|SHA1, priv-proto is none|AES. ‘-‘ indicates no hash. engine-id is hex string ‘0x0-9a-f’ up to 32 chars max.
-r|–reset
Return agent configuration to factory defaults
-C|–syscontact=<str>
System contact string as presented in sysContact.0. Up to 255 characters
-L|–syslocation=<str>
System location string as presented in sysLocation.0. Up to 255 characters.
-t|–targets=<str>
Set up to three targets to send SNMPv1 traps to. Format is: ip-or-hostname[@port]/community[,…] The default port is udp/162. (this overwrites previous settings)
-u|–users=<str>
Set up to five local users. Format is: user/-|auth-hash/-|priv-hash/model[,…] Where user is 32 chars max. ‘-‘ indicates no hash. Model is one of (none|auth|priv)
-i|–v3targets=<str>
Set up to three SNMPv3 notification targets. Format is: ip-or-hostname[@port]/remote-user/security-level/trap|inform[,…].
Example:
esxcli system snmp set -r
esxcli system snmp set -c anycommunity,anycommunity2
esxcli system snmp set -t 172.29.0.100@162/anycommunity
esxcli system snmp set -p 161
esxcli system snmp set -l warning
esxcli system snmp set -e yes
esxcli system snmp get
should return something like
~ # esxcli system snmp get
Authentication:
Communities: anycommunity, anycommunity2
Enable: true
Engineid: 00000063000000a1ac1d0c21
Hwsrc: indications
Loglevel: info
Notraps:
Port: 161
Privacy:
Remoteusers:
Syscontact:
Syslocation:
Targets: 172.29.0.100@162 anycommunity
Users:
V3targets:
The file that is created is /etc/vmware/snmp.xml, to edit it (Not generally necessary) directly type
~ # vi /etc/vmware/snmp.xml
<config>
<snmpSettings>
<enable>true</enable>
<port>161</port>
<syscontact/><syslocation/>
<EnvEventSource>indications</EnvEventSource>
<communities>anycommunity;anycommunity2</communities>
<targets>172.29.1.100@162 anycommunity</targets>
<loglevel>info</loglevel><authProtocol/>
<privProtocol/><engineid>00000063000000a1ac1d0c2e</engineid>
</snmpSettings>
</config>
Hit the escape key then type :wq! to save the file (you should see it type on the bottom left hand corner of your SSH window.
To start the service:
You can try /etc/init.d/snmpd start but doesn’t always work, another way is…
From the vSphere Client
Select the host and click the Configuration tab.
Click Security Profile > (Firewall) Properties.
Click SNMP Server > Options Button.
Click Start and stop with host Startup Policy >
Start button > OK.
Troubleshooting SNMP
If SNMP is not working, try this (Commands in blue):
From an SSH Session
~ # esxcli network ip connection list | grep 161
udp 0 0 0.0.0.0:161 0.0.0.0:0 11701841 snmpd
~ # esxcli network firewall ruleset list | grep snmp
snmp true
~ # esxcli network firewall ruleset rule list | grep -i snmp
snmp Inbound UDP Dst 161 161
If you do not have a value returned from the esxcli network ip connection list | grep 161command, try the following:
Make sure you are not out of space, delete the bad traps indicated by a bunch of .trp files. You may have a bad snmp target setting and the condition may lead to full disk.
Navigate to the directory by typing cd /var/spool/snmp
Delete the files by typing rm *
esxcli system snmp set -r
esxcli system snmp set -c anycommunity
esxcli system snmp set -e yes
esxcli system snmp get
For ESXi 5.0, 4.1
To enable SSH aka Tech Support Mode (TSM), in case you do not have it ready
From the vSphere Client
Select the host and click the Configuration tab.
Click Security Profile > (Services) Properties.
Click SSH > Options Button.
Click Start and stop with host Startup Policy >
Start button > OK.
Verify that the SSH service is running.
To enable SNMP
From an SSH Session
~ # vi /etc/vmware/snmp.xml
Edit the file as follows:
<config>
<snmpSettings>
<enable>true</enable>
<communities>anycommunity</communities>
<targets>172.29.1.100@162 anycommunity</targets>
</snmpSettings>
</config>
Type the escape key then :wq! to save the file.
~ # /etc/init.d/hostd restart
For ESX 4.0
To enable SSH (in case you do not have it ready)
Log in locally to the console using the “root” account
[root@vh-vmw-05 ~]# su
[root@vh-vmw-05 ~]# vi /etc/ssh/sshd_config
Change the variable for PermitRootLogin from no to yes
PermitRootLogin yes
Type the escape key then :wq! to save the file.
[root@vh-vmw-05 ~]# service sshd restart
To enable SNMP
From an SSH Session
[root@vh-vmw-05 ~]# esxcfg-firewall -e snmpd
[root@vh-vmw-05 ~]# vi /etc/vmware/snmp.xml
Edit the file as follows:
<config>
<snmpSettings>
<enable>true</enable>
<communities>anycommunity</communities>
<port>161</port>
<targets>172.29.1.100@162 anycommunity</targets>
</snmpSettings>
</config>
Type the escape key then :wq! to save the file.
[root@vh-vmw-05 ~]# service snmpd restart
Stopping snmpd: [FAILED]
Starting snmpd: [ OK ]
If you want to see if it is running type the following:
[root@vh-vmw-05 ~]# service snmpd status
snmpd (pid 13399) is running…
Blogger Comment
Facebook Comment